Showing posts with label Layering. Show all posts

Wednesday, July 4, 2012

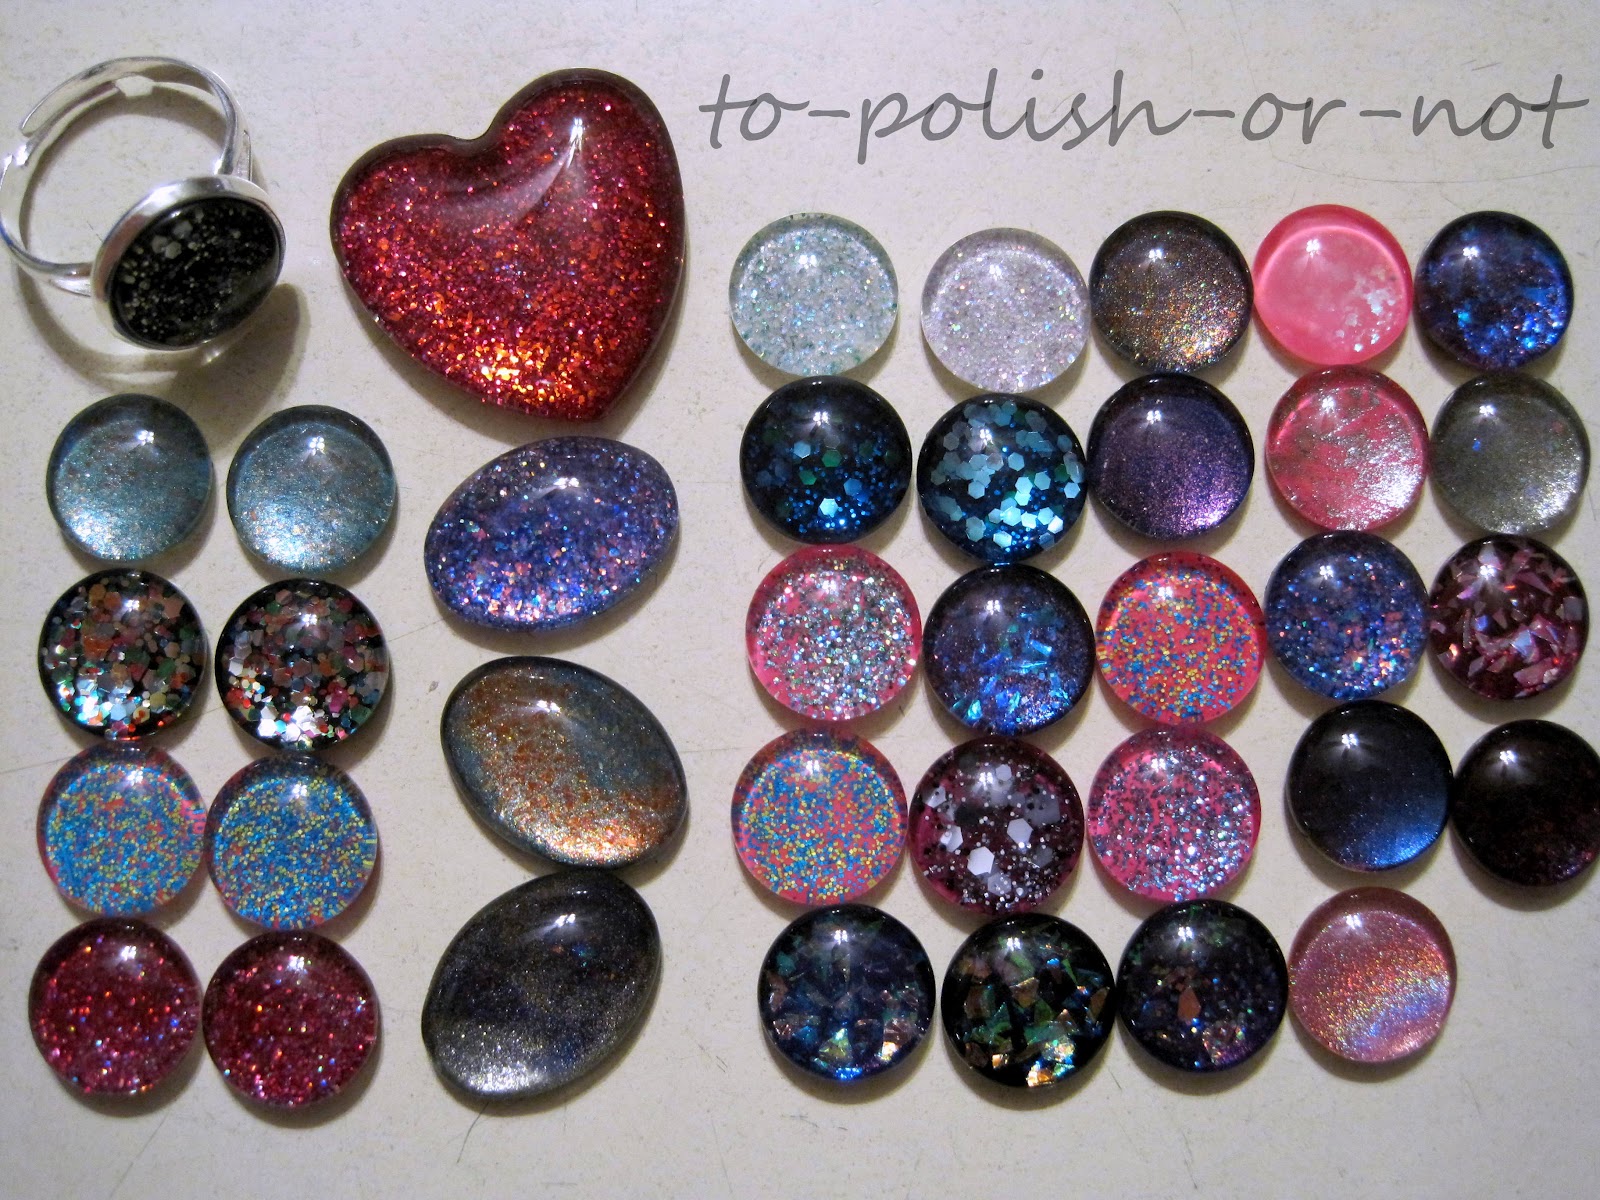
Nail Polish Jewellery ~ Painted Cabochons!


   Hello! I've been super excited about making my own nail polish jewellery lately! There are so many inspiring pieces on Etsy and other nail polish blogs. I ordered lots of supplies off eBay to make rings and earrings =)

Cabochons
are the clear glass domes that you decorate and insert into the different jewellery settings.

Here are some that I painted today!!! (and 1 finished ring) 
I can't wait to put them into the settings =)

Friday, June 15, 2012

Make Up Store ~ Blenda


Today I have an exciting polish to show you!

Make Up Store ~ Blenda

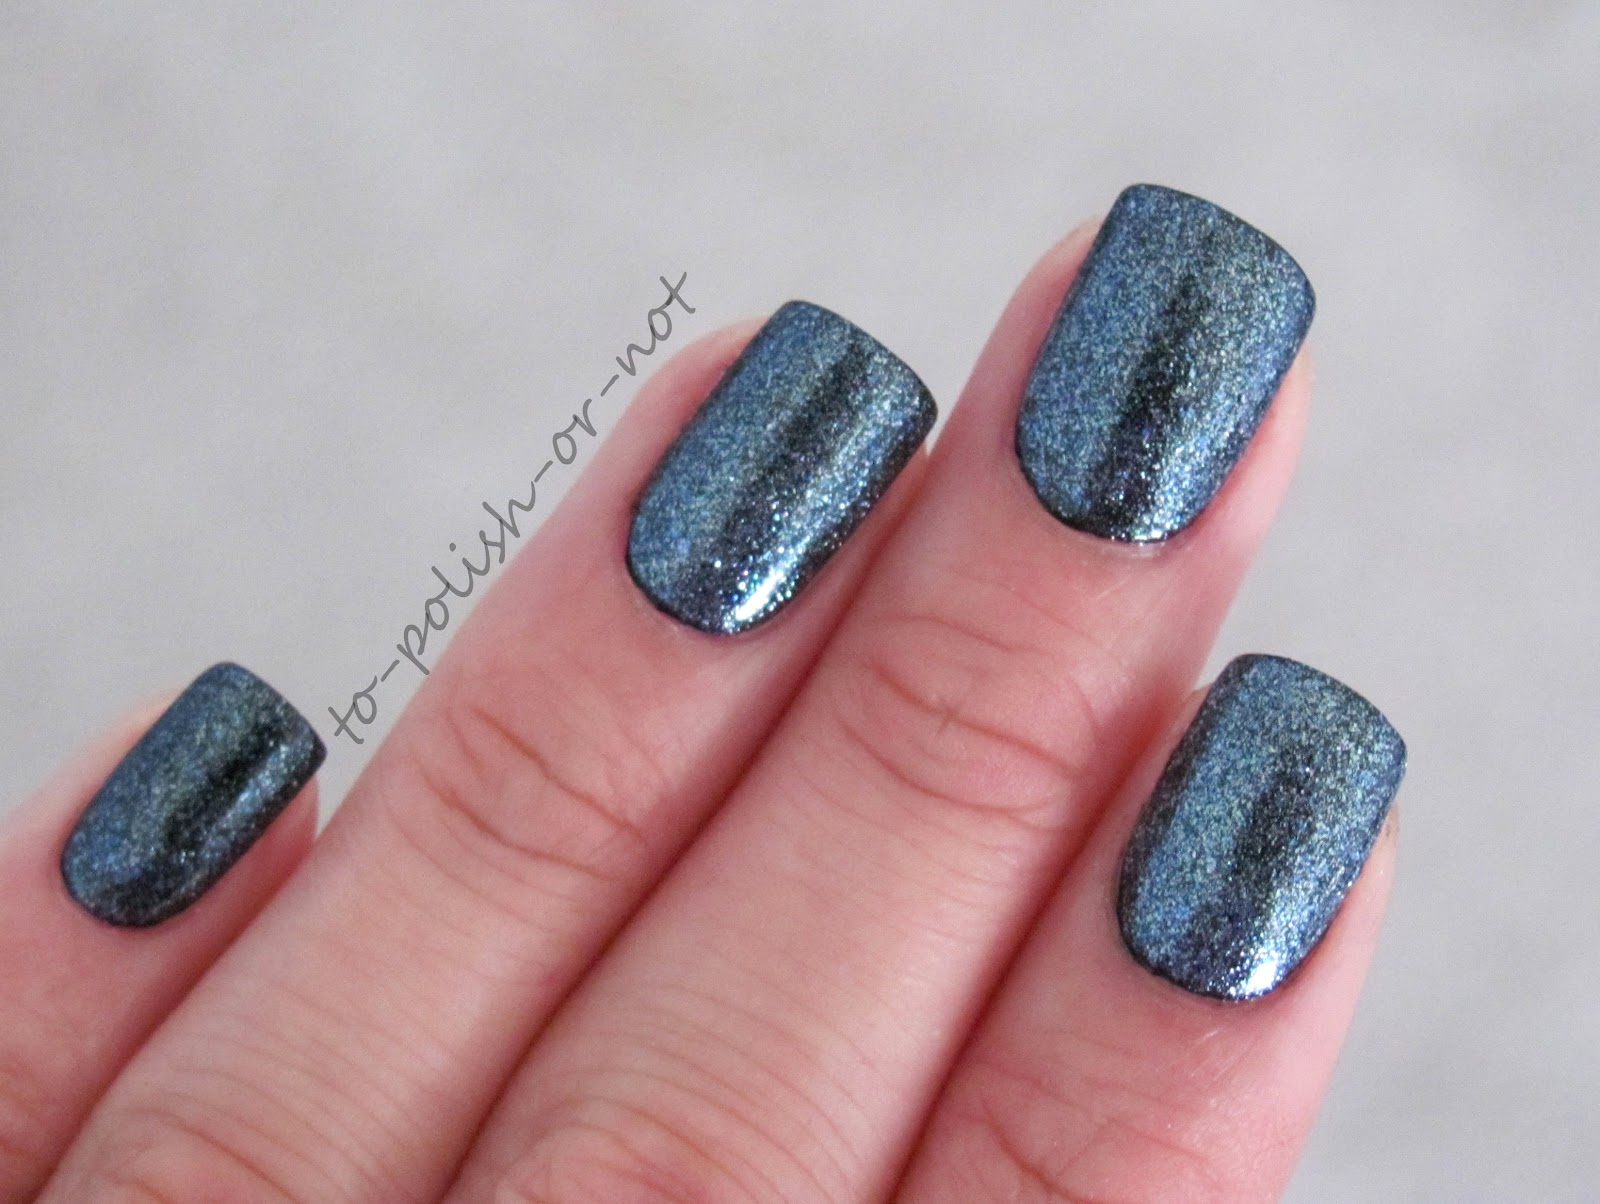
This is a fantastic polish for layering or wearing as a subtle shimmer on bare nails. Here I have 2 coats layered over the black creme, MUS Mika.

The black base coats bring out the gorgeous shimmery/flakie magic of Blenda. It gives off a blue/grey tint and plenty of sparkle!

I'm excited to try it over other base colours to see how they will transform!


   Close up // Blurry shot to show the shine
 
Here's Blenda on it's own // 2 coats

Hope you enjoyed! Any thoughts on what colour should I try layering Blenda over???

This product was sent for review by the lovely Muchion from MUS!
MUS polishes can be bought at Make Up Stores around the world, starting at $14. For purchasing within the USA and Canada visit the Denver store or phone in to place your order =)
Make Up Store
8425 Park Meadows Center Dr.
Lone Tree Colorado 80124
Store- 303-708-0086


Sunday, June 10, 2012

OPI Hearts!

A few days ago I tried layering with a new OPI polish that has heart glitters in it. It's called "Nothin' Mousie 'Bout It" and it's from the new OPI Vintage Minnie Mouse Collection!


This is 3 coats of the heart glitter over 2 coats of OPI Pepe's Purple Passion (which I hate with a passion...), topped with 1 coat of Revlon Quick Dry Top Coat. You can easily get away with only 1 coat of Nothin' Mousie 'Bout It, but I really wanted to cover up Pepe's...

Nothin' Mousie 'Bout It was super easy to apply. The funny thing is that when you are trying to just get hearts, none come out, BUT when you are just trying to get the flakie-shimmer, all you get is hearts... go figure. This polish has a beautiful micro-flakie quality to it and I would highly recommend it! If you aren't one for hearts, just leave the hearts in the bottle and buy it for the pink flakie-shimmer!

Thursday, March 15, 2012

Nicole by OPI - Opal Texture Layered!

Yesterday I introduced you to NOPI - Opal Texture, as promised, here is it layered over a few different polishes! I have one coat of NOPI - Opal Texture over 6 difference polishes and topped with 2 coats of top coat =)

L->R: 
Ozotic 505, 506, 528 
(all over black except half of 528)
L->R: 
China Glaze - Frostbite
Color Club - Pucci-licious
Color Club - Poptastic
Look at the sparkle! It's much more pink and much more sparkly in person! I love it over the pink and purple! 

Thoughts???


Wednesday, December 7, 2011

If you have Barielle ~ Elle's Spell. . . YOU MUST TRY THIS!!

So, you may or may not know that I am not a fan of reds...
Well when I got Barielle ~ Elle's Spell I WANTED to love it, but let's face it, it's a red! Elle's Spell is a flakie in a red jelly base. Often times people will layer it over black, but I dislike black/dark vamps as well... Soooo, when my bf selected it for me to wear, I decided I would make this work...

I Present you with my awesomesauce   Elle's Spell hologram mani =D

If you have Elle's Spell + a holo glitter, YOU MUST TRY THIS!!! PICTURES DO NOT DO IT JUSTICE...
you could probably also get the effect with by layering a flakie polish and a jelly polish if you don't have Elle's Spell... =p

To get this amazing look, I used:
** 1 coat of Sugarplumb Fairy
** 2 coats of Elle's Spell

(BC = Orly Bonder, TC = Poshe)

<--- Here is Color Club ~ Sugarplumb Fairy
for reference (from the Beyond the Mistletoe Collection)

Depending on the lighting, the polish is mostly red with undertones of pink and black. It has great depth, as the scattered-holo glitter and orange-green flakies look embedded within the polish. It shimmers, shines and sparkles in every light and at every angle! It reminds me of those silver hologram stickers I used to get when I was little...
(all photos are clickable to enlarge!)


And here's a SUPER DUPER EXTRA LARGE CLOSE UP!!


I think I'm liking this red...

What do you think??


Monday, December 5, 2011

Barielle ~~ Buddha-ful


Here I have for you a Barielle polish, Buddha-ful! I recently found it at Winners in a set of 5 polishes. 

The other polishes I got were Decadence, U-Concrete-Me and Slate of Affairs (and another Buddha-ful for frankening!).


Buddha-ful is a nude based polish with green-blue flakes. It is sheer and here I have on 2 coats topped with Revlon Quick Dry. I don't mind that this polish is sheer. It's like a jelly-creme. It kind of gives the look of a soft french manicure with a subtle exotic hint of sparkle.

In most lights the flakies appear green like here...
...and here...
...but at extreme levels and just the right lighting, you can see the blue.
**Note: This polish is not meant for layering over dark colours. It has a very milky base and will most likely look streaky. However, I have tried it over the 3 other Barielles I got and it looked good! Just make sure you do a really thin layer!

I also want to try perhaps thinning this polish out and also frankening it into tinted shades. Hence the backup I got =)

Here's my layering: 
I like it best over the grey

Have you had success layering or frankening with Buddha-ful? 
If so, let me know your combos!


Friday, November 18, 2011

MPJ... Purple Flash!


I think the pictures pretty much speak for themselves...!

Here we have
OPI My Private Jet!

For those of you who are new to holo polishes, there are MANY versions of MPJ. The current version is brown with a faint scattered holo. "Black" linear holo, "brown" linear holo, and "teal flash" are just some of the versions known to exist.

See how this one has a hint of purple? Well, here is my
PURPLE FLASH MPJ!

Saturday, October 29, 2011

My Halloween Nails!

Hello! Sorry it's been so long since I've last posted. School's been pretty hectic, but I've been taking pictures of all my polishings to show you later! I'm also working on a post about dusty hunting since I've received many questions from people wondering how to find old HTFs (hard-to-finds).

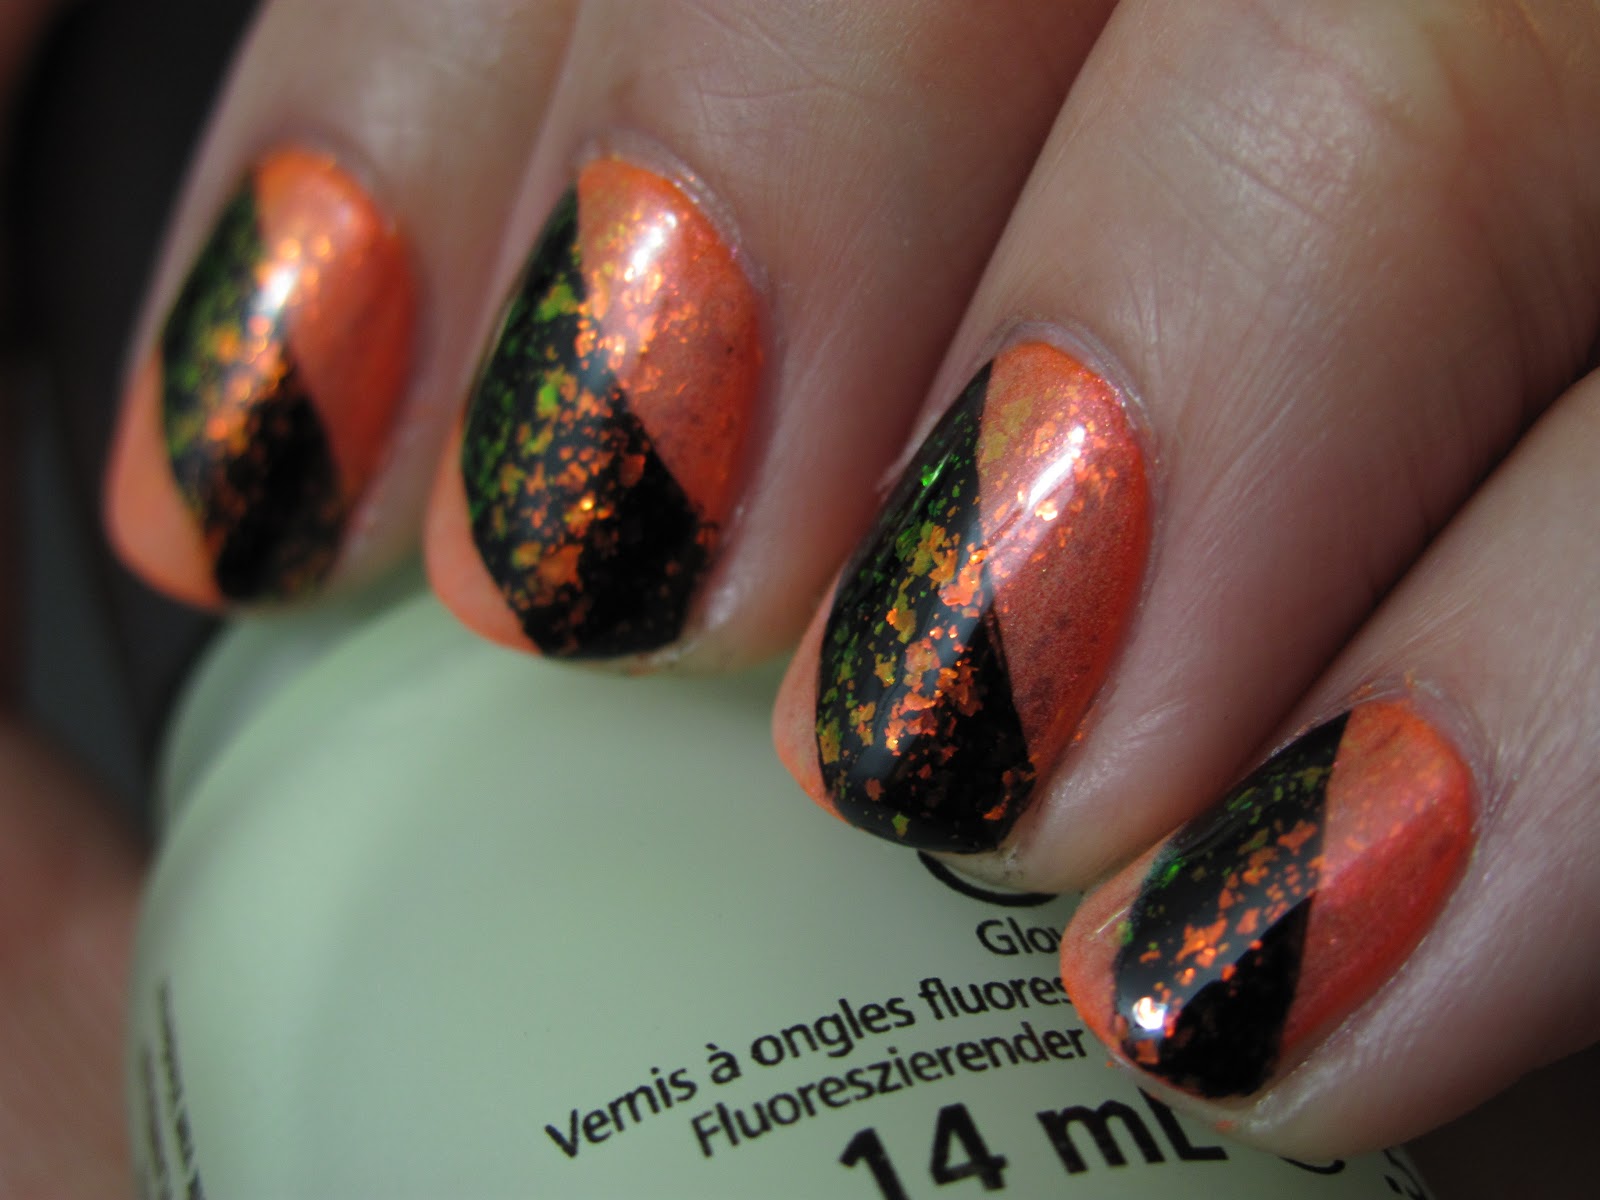
While the rest of my posts can wait, I figure I should at least get my Halloween one up before Halloween! so here it is =D I wanted to do something festive, but not too in-your-face, because I have work all day tomorrow! I think this simple design worked very well =)

I used: Color Club - Polish For All // Nina Ultra Pro - Molten Gold // China Glaze - Liquid Leather // Nubar - 2010 // China Glaze - Ghoulish Glow


This is 2 coats of Polish For All, then Molten Gold was used to dull out the orange, as it is very VERY NEON! Molten Gold is a gorgeous sheer pink-orange duochrome. I then used a brush to paint the black diagonal lines, it came from the set I got off eBay. Lastly, I used 2010 over the entire nail and topped off the orange sections with 2 coats of Ghoulish Glow! Ghoulish Glow is a great glow-in-the-dark polish. It is fairly clear and produces a good glow-effect with two coats.

Here is what Polish For All looks like alone. It is even brighter in real life! It came in the Color Club Pride set.

When I first got Nubar 2010, I knew that I'd be using it for Halloween. I'm not a huge fan of the orange-green flakies, I'm still looking for the perfect blue-duochrome flakie, but I think 2010 worked perfectly here!
...and here is what it looks like when it *glows in the dark*!

***Did you do Halloween nails?? Comment with a link so I can check them out!
Related Posts Plugin for WordPress, Blogger...